 P4 Software
/
logisticaHQ-en
P4 Software
/
logisticaHQ-en
Customer Setup, this is where you will configure your customers information. Please complete as many details as possible as this data is used in various areas of the LogisticaHQ System.
If you are NOT using multi-Company or 3PL there will be no client names listed. This is by design...
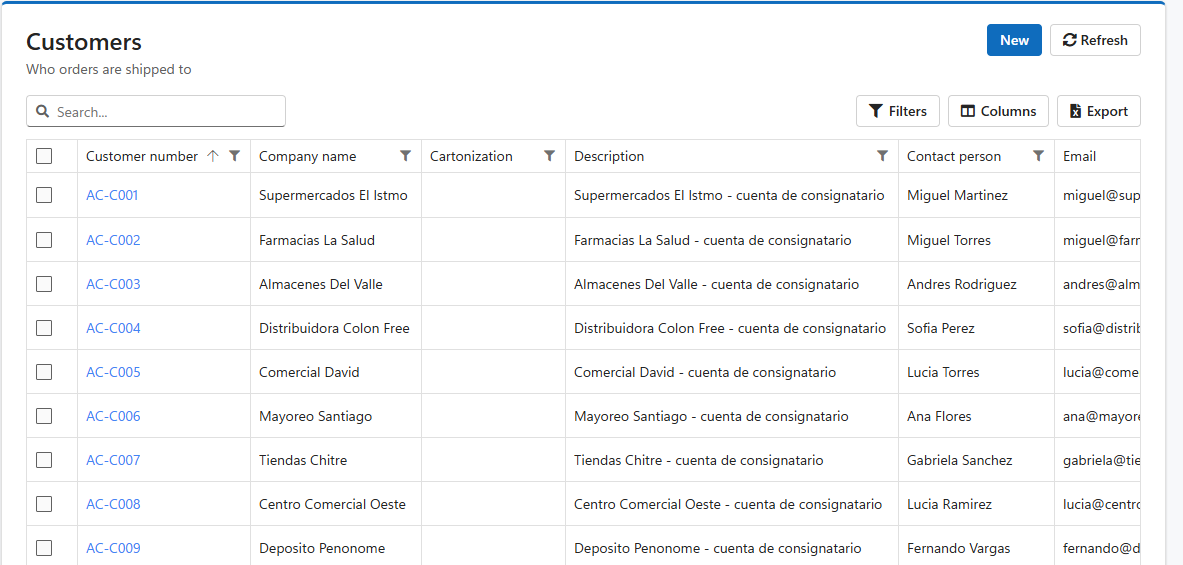
Click the New button to add a new customer or click the blue text in the Customer Number column to edit an existing customer.
The Customers page features a listing of all the customers available within the Warehouse Management System software. There are columns for Customer Number, Company Name, Description, Contact Person, Email, Client, and Created. There is also a “New” button at the top right (to create new Customer profiles and a “Refresh” button (to update the list after any changes). The “Export All Data” button is located just under the refresh button appearing as a black folder encircling a white X.
and select the “Submit” button.
Client is not used unless the System is Setup for 3PL or Multi-Company.
. On the left side is a Details section to input an Email address, a contact person and miscellaneous information in the Description field. In the upper right corner are two buttons: the “Update” button will save any changes made to the Customer profile and the “Refresh” button will display any such changes. On the right is the Addresses section to input one or more addresses for this Customer, including an “Add” button for the addition of new addresses. Lastly at the bottom is a Settings section for Product Expiry Allowance (the Customer does not want any item that expires within the time chosen; default set to 70 days).
, Phone, Address1, City, Province, Postal (Postal Code) and Action. To delete an address, select the icon (black x inside a white box) under the Action column for corresponding address. To edit an address, choose the selection text under the Name column. This will activate the Address pop-up window.
for choosing this address as the default address for this Customer. Enter, remove, or add any address details in the various fields as desired. Once finished, select the “Submit” button at the bottom to complete the address.
| Setting | Use |
| Auto print Packslip on ship | Inherit / Yes / No. Whether this customer's packing slip prints by itself when an order ships. It also decides whether the BOL prints by itself when this customer's Truck Load or Master Truck Load ships. Inherit follows the 3PL client, then the company setting. |
| Auto print Packslip on carrier label | Inherit / Yes / No. Whether the packing slip prints by itself when a carrier label is created for this customer's carton. Turning on both this and the one above prints two packing slips per order. |
| Pack slip printer, BOL printer | Optional. Where this customer's packing slips and BOLs print when they print by themselves. Used only when the dock door, the shipping user's printer role and the Warehouse name no printer, so in a company with several Warehouses leave them blank and set the printer on each Warehouse instead. |
| Auto print BOL on sign | Not used at present. |
Was this page helpful?